Contents
Alumni - Add & Manage - Overview
C) Alumni can Register themselves by visiting your Alumni Site
Video Overview
Alumni - Add & Manage – Overview
There are multiple ways to add alumni:
- Bulk import alumni by uploading a file;
- Add New Alumni;
- Alumni can register themselves from your alumni site.
A) Bulk Import Alumni
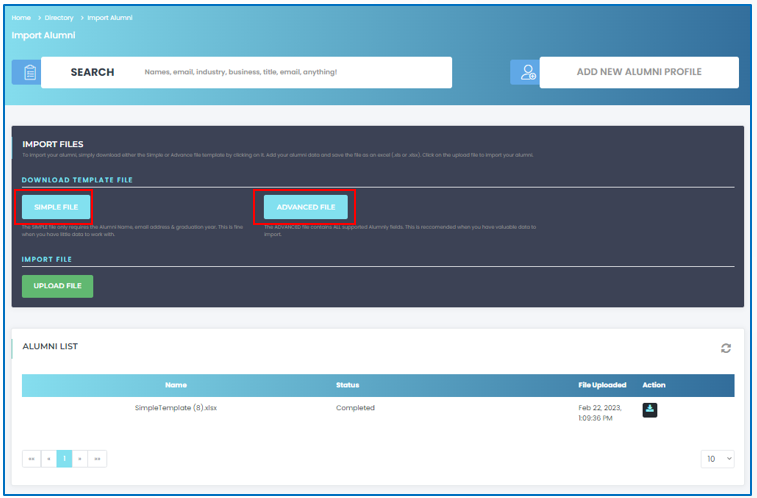
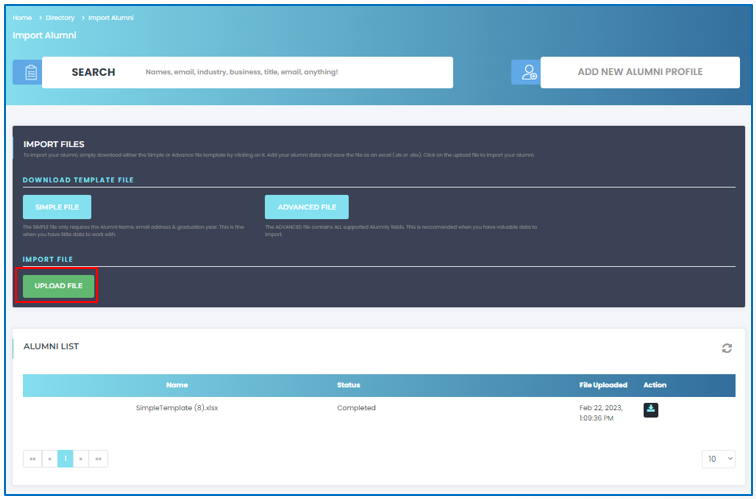
- Go to “Directory” and select “Import Alumni”
- On the Import Alumni page, click on either “Simple File” or “Advanced File” button. Both of these options will provide you with the details and provide you with an option to download the Sample File
(i) Simple File pop-up window screen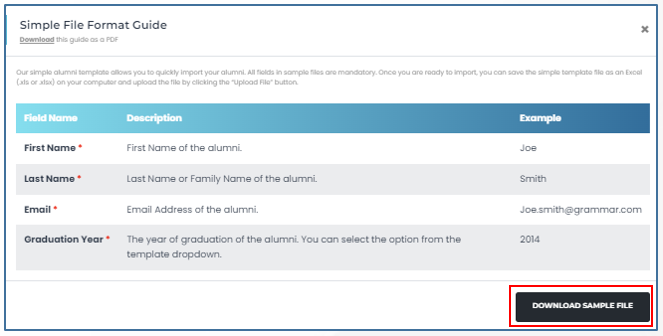
(ii) Advanced File pop-up window screen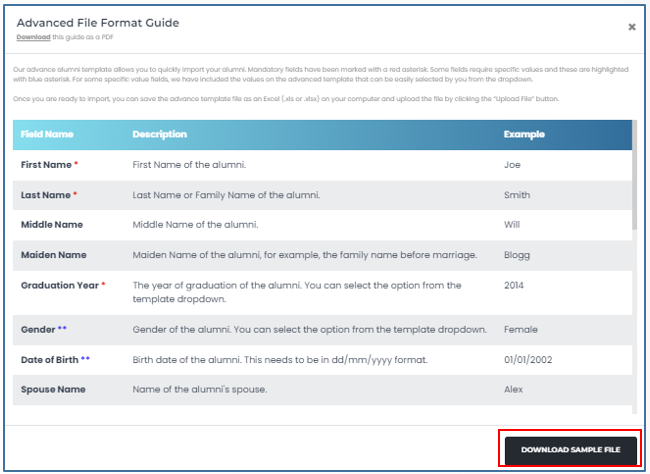
- Complete the sample file with the relevant alumni information and save it to your computer
- Go back to “Alumni Import” page (Directory à Import Alumni) and click on the “Import File” button and upload the alumni sample file you saved in your computer
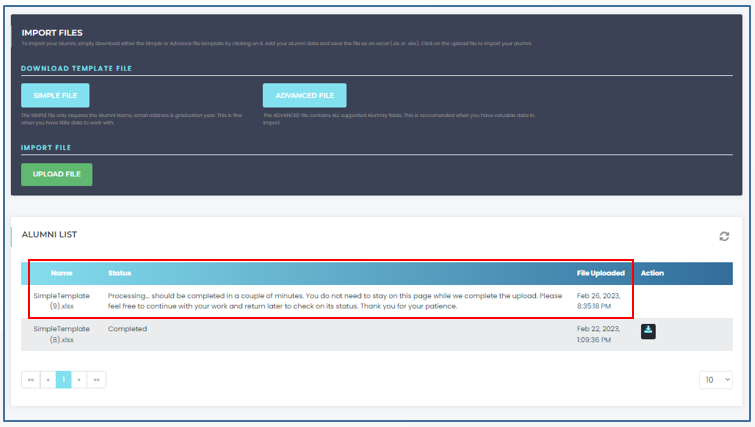
- The system will start processing the file and the status will display the message saying that the file is being processed
-
After the system has completed processing the file, the status will display message as Completed and under the Actions section the download image will appear
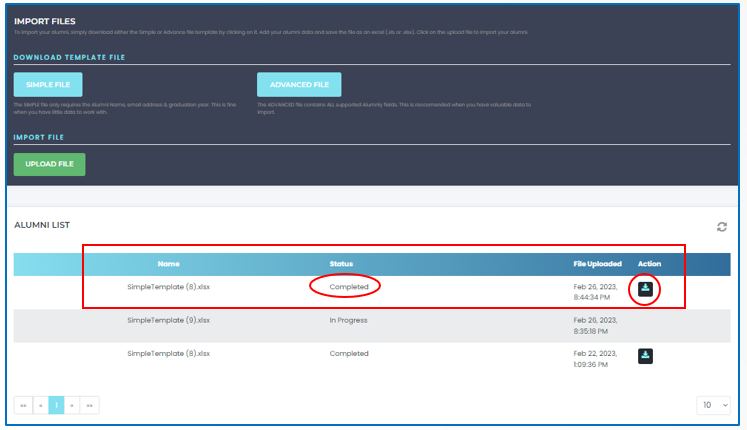
- Clicking the “Download Image” button will download and open the excel file with information about the data file you uploaded. This file will provide you with the status for each and every record along with the Reason for any failed status.
You can amend the failed status records to re-upload file if required.
B) Add New Alumni
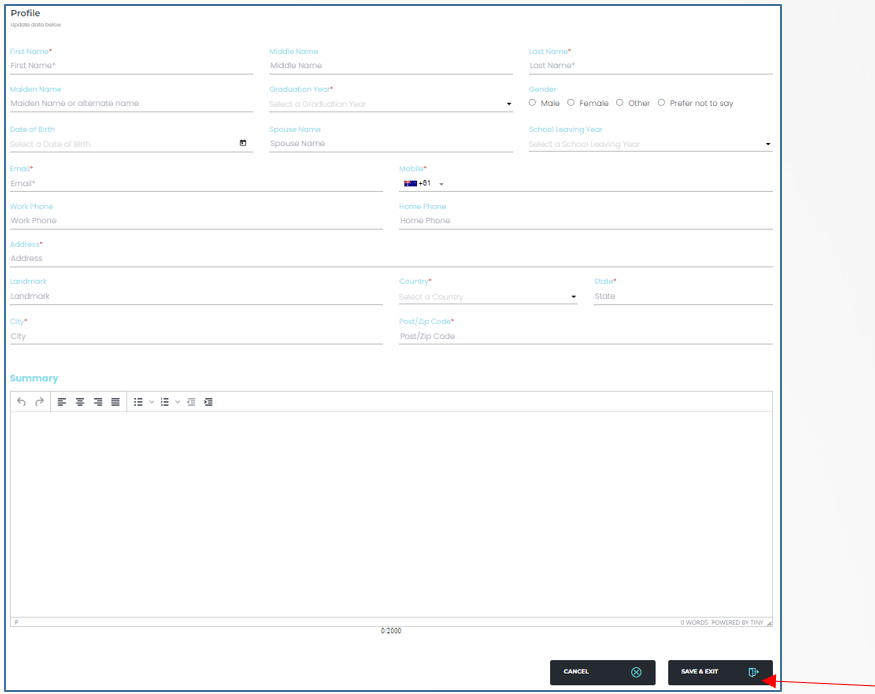
- Go to “Directory” and select “Search Alumni” and click on the “Add New Alumni Profile” link

-
On the “Add New Alumni Profile” page complete all the relevant information on this page then click on the “Save & Exit” button
- The alumni get added to your site and the system sends an invitation email to the alumni.
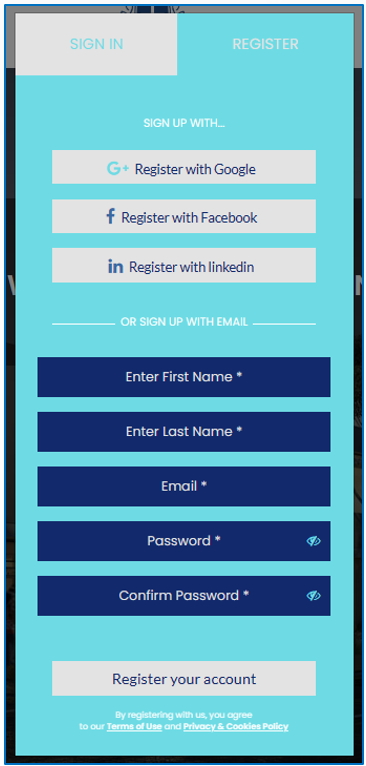
C) Alumni can Register themselves by visiting your Alumni Site
- Alumni visits your alumni networking site and click on the “Sign-In or Register” button. The below is an example of our demo site

- This opens the “Sign In or Register” window. The alumni then click on the “Register” tab and select how they prefer to register on your alumni site